

Hey everyone,
I’m Chris also known as fuzzy59 and I figured it was about time to finally get some pictures together of what my jeep looks like and what I’ve done to it. I’ve had a ton of fun with my jeep over the years and I don’t plan on stopping that anytime soon. I bought my jeep about 4 years ago when I was back in college and it’s treated me well ever since. I’ve done a bit of wheeling over the years and I’ll try to post some pictures up for you guys and gals as I find them.
Here’s a run-down list of what it currently has on it:
1998 5.9L GJC
Loaded with all the bells and whistles
3” Skyjacker lift
Front upper Rubicon Express adj ca’s
Front lower Skyjacker fixed arms
OME shocks all the way around
265/75/16 BFG M/T’s and a 265/75/16 BFG A/T spare
Twin City Turbo Dual Intake
ARB Bull Bar with Warn winch and 6” Super Rally’s
TrailReady Rear Bumper with tire swing and custom receiver hitch
KOR Rock Rails
KOR Roof Rack with Hella 500’s
Cobra 29 WX NW ST with a Firestik Antenna II and Cobra HG-S500 PA
48" Hi-Lift All Purpose Mechanical Jack
Axe
Shovel
Gas can
An assortment of tools and a bunch of other goodies that I'm sure I forgot. As I get new stuff or if I forgot some things I’ll be sure to post them up as well.
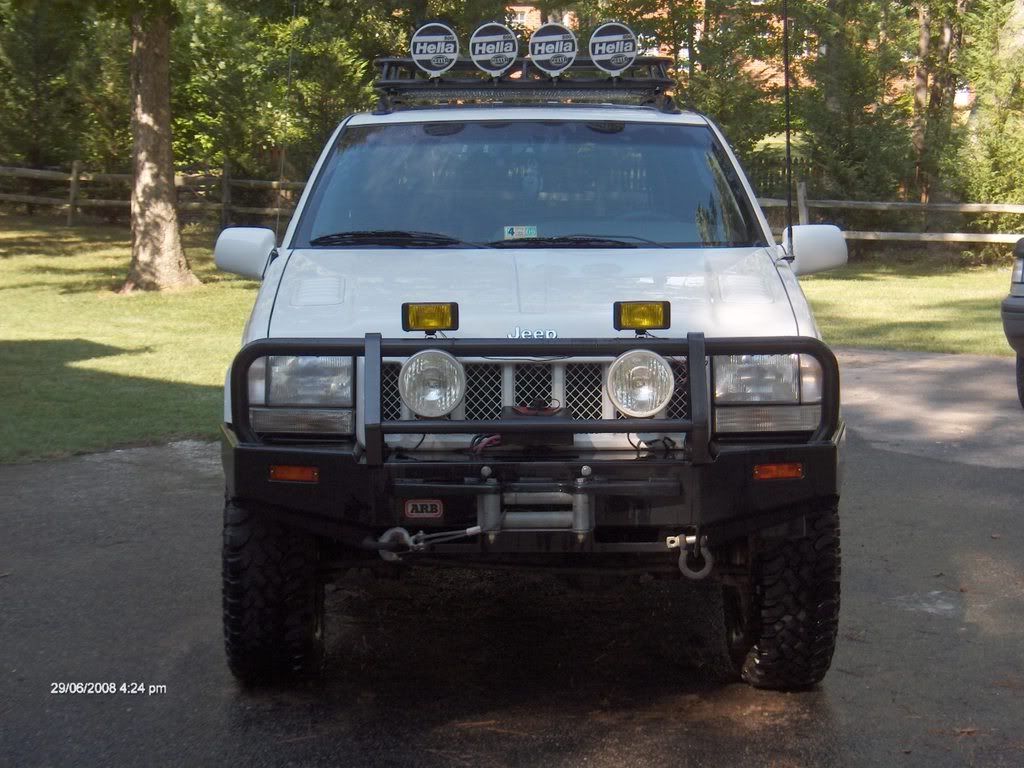
And here's picture of the jeep all purdy up
![Image]()
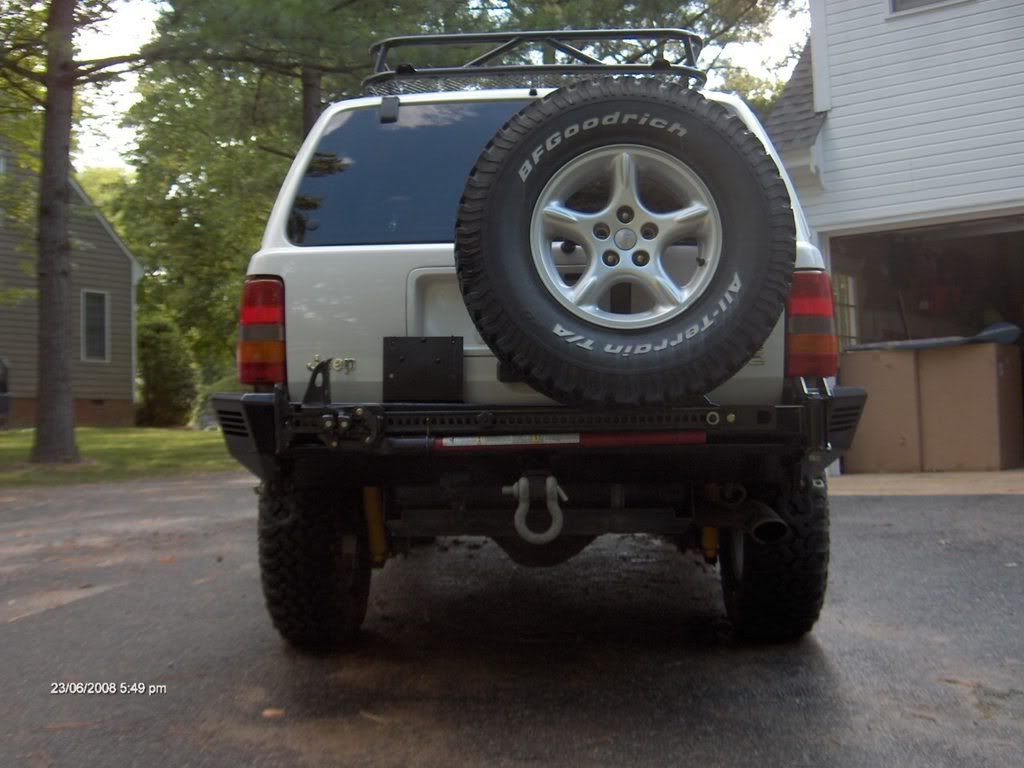
And a picture of the behind
![Image]()
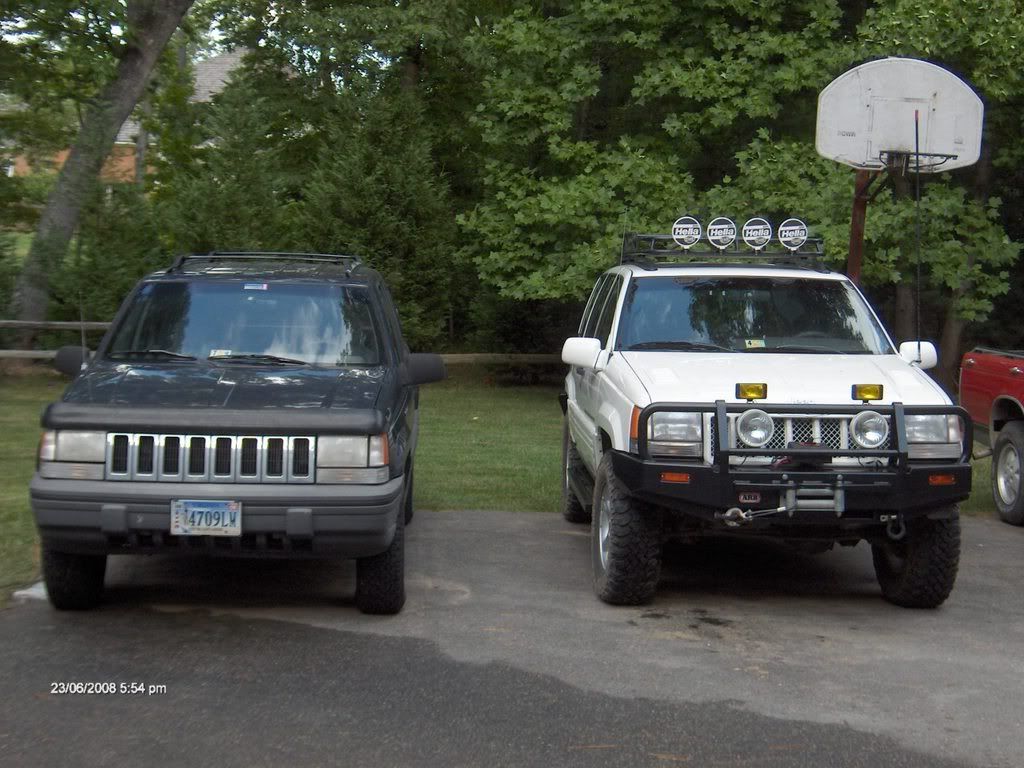
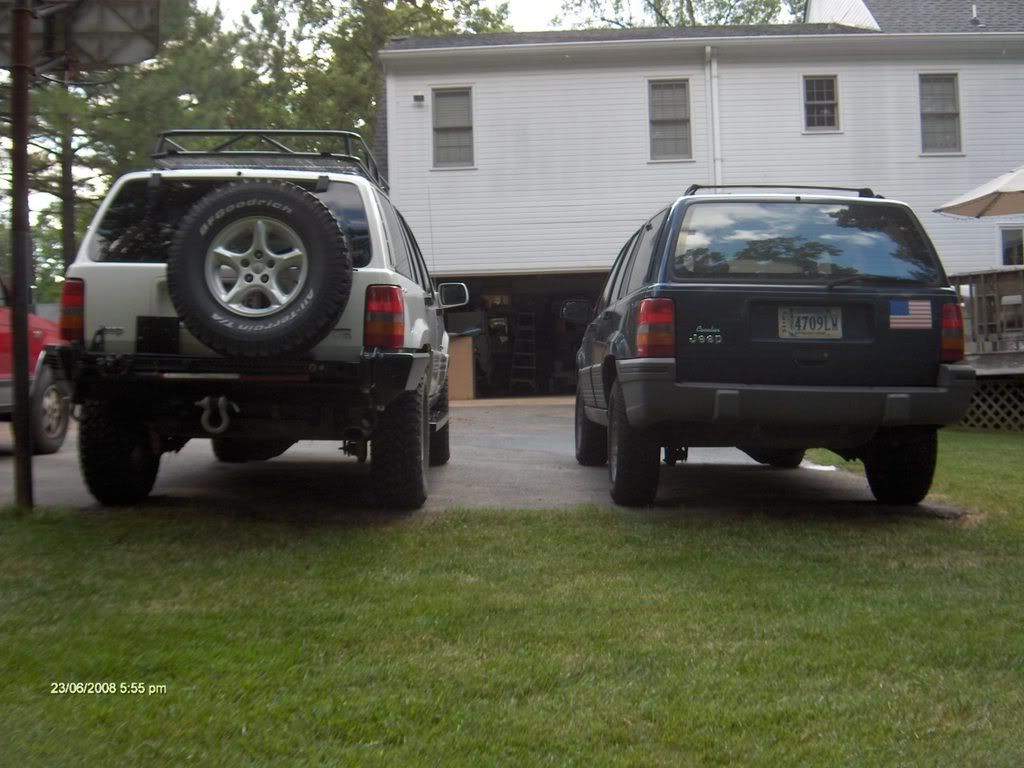
And here is my jeep next to my DD on 225's:
![Image]()
![Image]()
Well I got a lot of big plans here in the very near future, I’ll be posting up as much as I can so that anyone can follow my build. Feel free to comment as much as you want and I hope you enjoy my jeep as much as I have.
Chris
I’m Chris also known as fuzzy59 and I figured it was about time to finally get some pictures together of what my jeep looks like and what I’ve done to it. I’ve had a ton of fun with my jeep over the years and I don’t plan on stopping that anytime soon. I bought my jeep about 4 years ago when I was back in college and it’s treated me well ever since. I’ve done a bit of wheeling over the years and I’ll try to post some pictures up for you guys and gals as I find them.
Here’s a run-down list of what it currently has on it:
1998 5.9L GJC
Loaded with all the bells and whistles
3” Skyjacker lift
Front upper Rubicon Express adj ca’s
Front lower Skyjacker fixed arms
OME shocks all the way around
265/75/16 BFG M/T’s and a 265/75/16 BFG A/T spare
Twin City Turbo Dual Intake
ARB Bull Bar with Warn winch and 6” Super Rally’s
TrailReady Rear Bumper with tire swing and custom receiver hitch
KOR Rock Rails
KOR Roof Rack with Hella 500’s
Cobra 29 WX NW ST with a Firestik Antenna II and Cobra HG-S500 PA
48" Hi-Lift All Purpose Mechanical Jack
Axe
Shovel
Gas can
An assortment of tools and a bunch of other goodies that I'm sure I forgot. As I get new stuff or if I forgot some things I’ll be sure to post them up as well.
And here's picture of the jeep all purdy up
And a picture of the behind
And here is my jeep next to my DD on 225's:
Well I got a lot of big plans here in the very near future, I’ll be posting up as much as I can so that anyone can follow my build. Feel free to comment as much as you want and I hope you enjoy my jeep as much as I have.
Chris


