Jeep Grand Cherokee Forum banner

The Abominable WJ – Project Yeti

2 reading
161K views 509 replies 67 participants last post by  argentums  
#1 · (Edited)
I finally got around to posting some pics of the WJ. Here it is all cleaned up, begging to get muddy.

It is the snow monster, so I call it the Abominable SnowJeep, or Yeti
Yeti is a name for the abominable snowmonster (Nepal/Tibet).

Image


I learned real quick how much I like the MTRs after towing the boat through a 100 yard section of really deep mud. The boat was a mess. After getting a few feet in, I thought I had made a huge mistake.

Image


Time to take a bath and get cleaned up. This is much better than waiting for hours at the boat ramp to put it in and out.

Image


Bear Lake

Image


First time out wheeling it.

Image


I don't dare flex too much, This thing needs some serious trimming before I can discover Moab. 315x75x16's are pretty big tires for the jeep. In front of the rear tire will be OK, but something needs to be done about the rear bumper.

Image


Motivation for visiting friends to lift their Grandy. He is currenlty raising his Gas tank and building a rear bumper. He may end up making many of the parts to do his own long arm kit. You can see the beginnings of the rocksliders he is making. They have been used extensively since he has been running in Moab without a lift.

Image


Not to bad of a cruiser though. I really like the feel of the Long Arm kits. Much smoother than I had anticipated.
 
#485 ·
Time to share some pics from our recent Moab Trip...
Upon our return, there were a few things to replace: Licence plate light, torn mud flap, air filter, clean throttle body...I still need to take the front end apart, I believe I damaged a CV. I will also replace my steering stabilizer as it is now toast :)
Here is my cool co-pilot, the WJ is her DD:

Dropping into Cliffhanger:

View of Cliffhanger entrance from below:

Cliffhanger has some amazing views, and also some large drops:


Clgielin and I:

End of Cliffhanger, great views:

Coming back out of Cliffhanger:

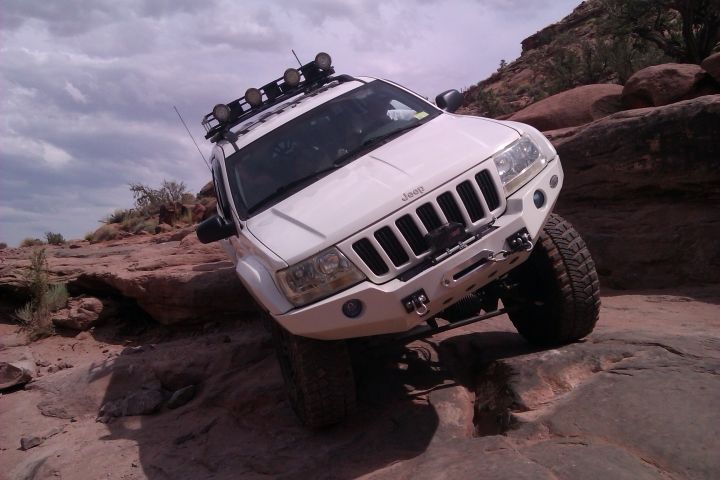
Getting tippy:

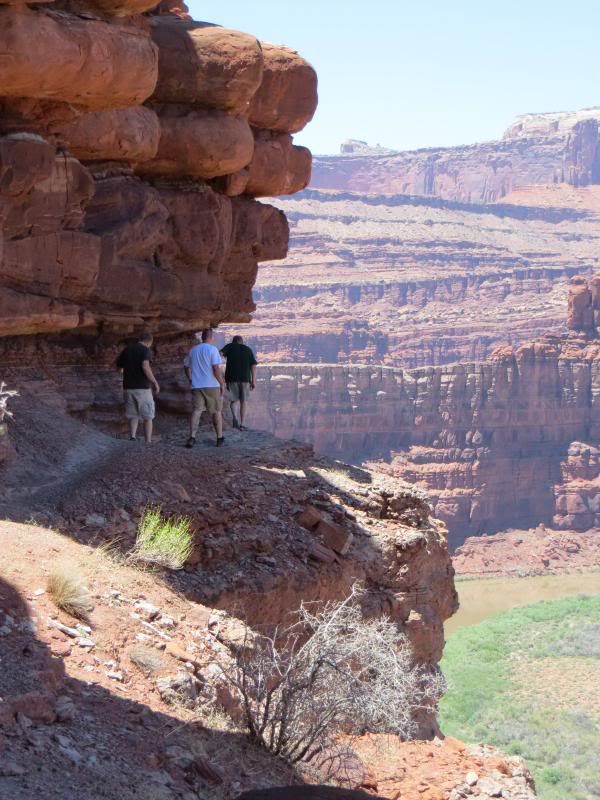
Hiking around the cliff on Chicken Corners:

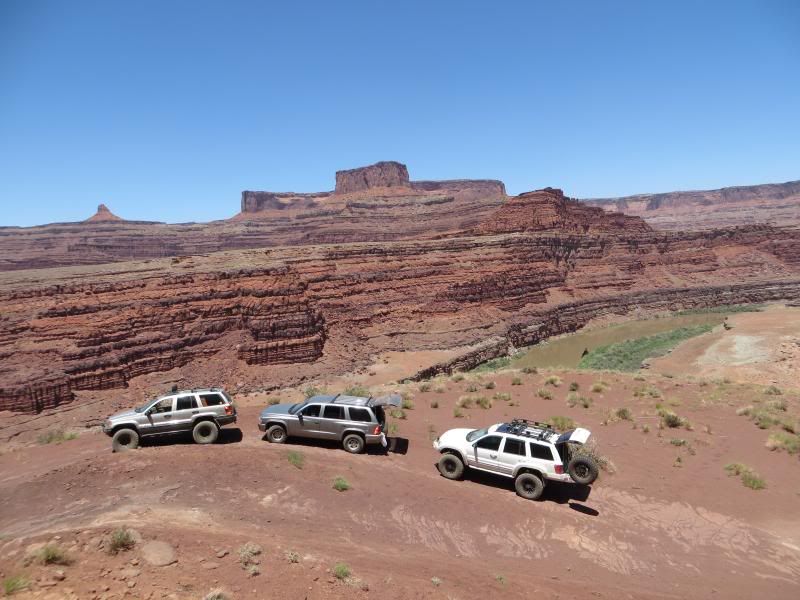
End of the trail on Chicken Corners:

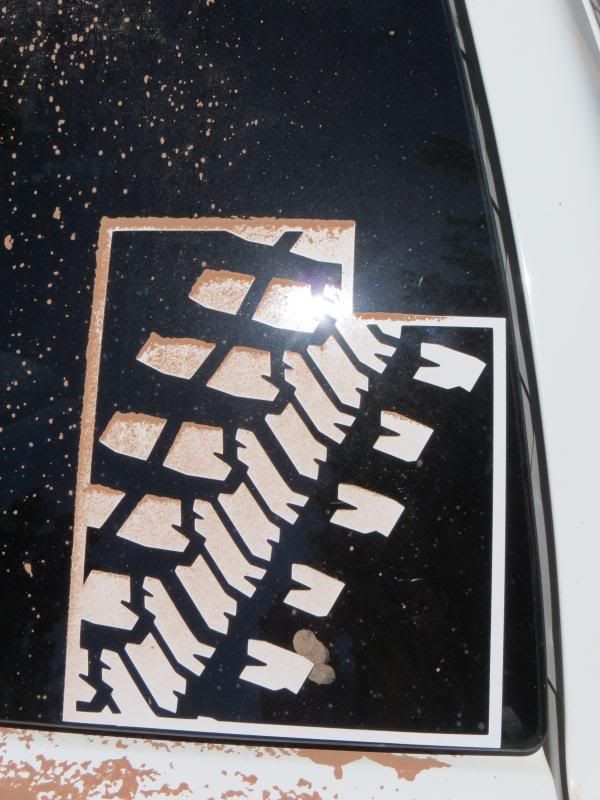
Red Dirt looks cool on the Utah JeepCrew sticker:

Night wheeling on Fins:

Messing around after exiting Strike Ravine:

Maybe I'll get around to editing more video after this last trip, I have been slacking.
 
#486 ·
Awesome Jeeps and scenery. I have watched your build over the past years and I would agree with the many on here, favorite WJ by far. Haven't made it to Moab yet but its in the plans one day, well once my Jeep makes it through its last phase of build work but who are we kidding Jeep builds never really end they only get better.
 
#487 ·
Thanks slowcrawler! Yeah, the build never ends...there are always more things to do. If the build does ever end...there are always "fixes" to take care when you break stuff :)
 
#488 ·
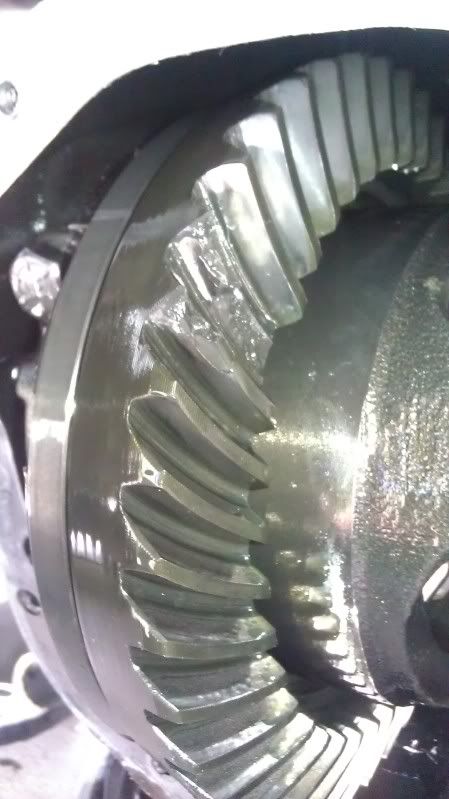
Well....it wasn't a cracked CV cage like I hoped. But at least I was able to make it home from Moab:


New Yukon R&P along with master install kit is on its way.
 
#489 ·
Parts arrived on Wednesday, so I took Thursday off to get the Jeep back on the road:

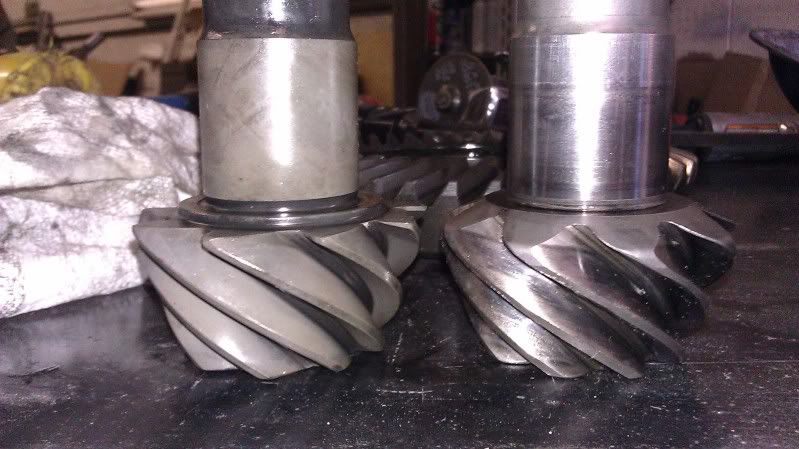
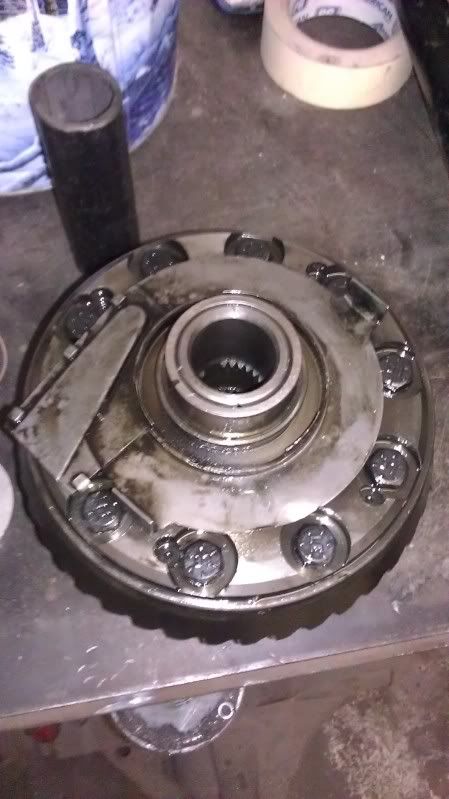
I thought all my gears were Yukons (I know the rears are, but Six States may have just used whatever D30 stuff they had on the shelf). The pinions look different, the left one is the Yukon and it has a larger contact tooth:

The passenger side of the carrier has an attachment (may have something to do with the varilock) on it that didn't allow me to use the bearing puller the way I wanted to without destroying it...so we cut the bearings off with a grinder, then sliced into the inner race, and used an air hammer around the lip of the inner race to get it off of the carrier. Long process, but it worked:


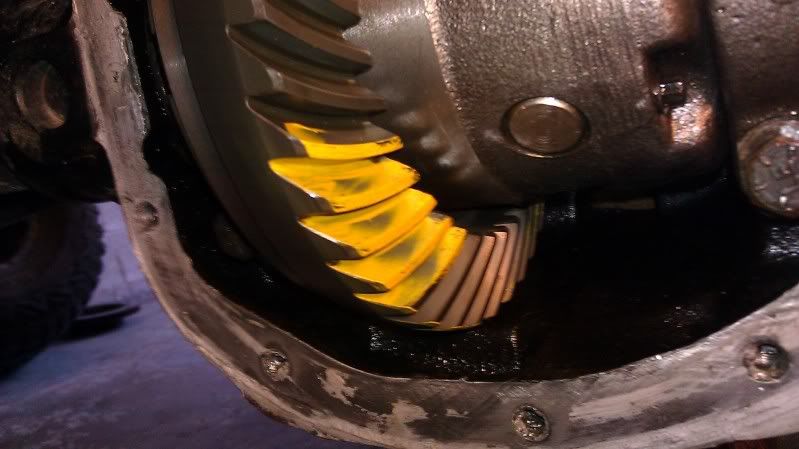
We put it together to see the pattern and left all shims as they were before. BTW, the pinion was a beast to tighten. I had a pipe wrench on the yoke and against the LCA while tightening it with a 24 inch breaker bar. We got really lucky, the pattern looks great. I am no gear pro, and was lucky to have the help of my bro. He is my go to mechanic when something is beyond my skills.

It feels better on the highway than it did before. I also replaced the diff side u-joint in the front driveline, and rotated the tires. My highway test last night and this morning were both great, now to get some miles on this and see how it starts wearing. I'll check the pattern again in 500 miles when I change the fluid again.
 
#491 ·
Thanks guys!
 
#492 ·
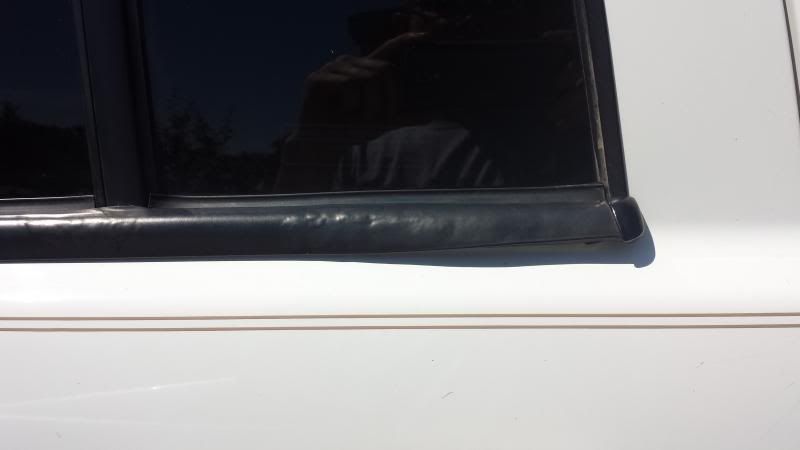
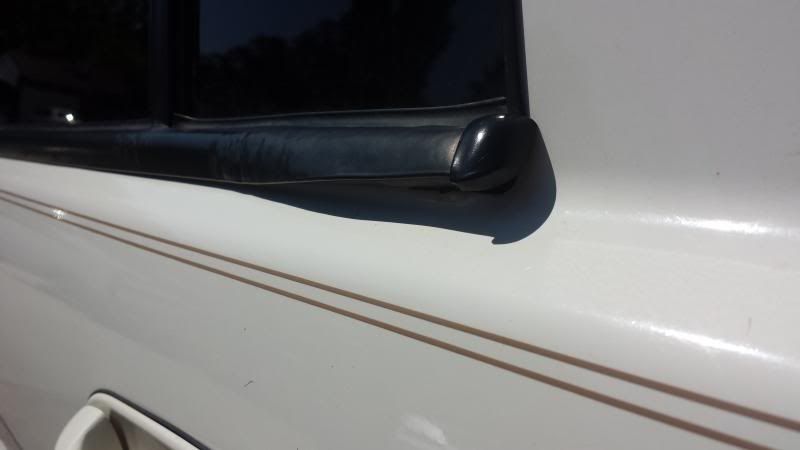
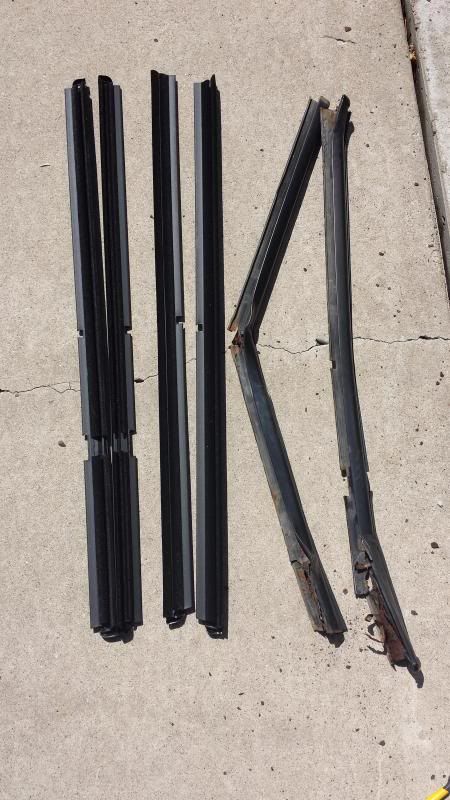
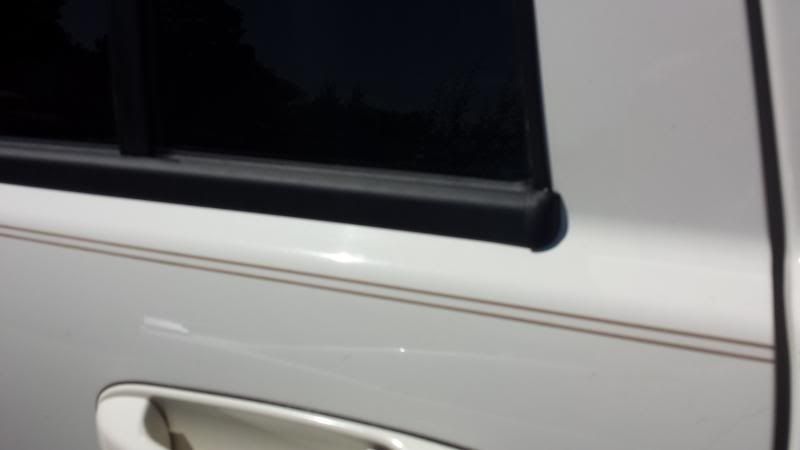
Last week I finally ordered new window scraper seals for the Jeep. They were getting really bad, and it was time. Here are some pics of the worst one, it was rusting from the inside out and bulging away from the body.


This view shows how much it was starting to push away from the door because of the internal rust and swelling:


There was an incredible amount of rust that was falling out during the removal of the old ones. All 4 took about 10 minutes to remove and install.


The new seals look so much better.
 
#495 ·
I bought them from teamgrandcherokee.com for $99 + about $18 shipping (in the states of course). They arrived in just a few days. That was cheaper than I could find them anywhere else.

I pulled them all out by bending the back edge upward, then just started to pull. There is somy type of clip edge that the trim gets caught on. I used needle nose plyers to grab the metal (what was left of the metal) and yanked it upward. The molding then came off very easily. Just push the new ones down in place, very easy. With the front ones, you start pushing them down, and then push it forward so that the trim tucks inside/under the mirror.

Very easy job.
 
#497 ·
I have just sat through 50 pages of the most interesting Grand Cherokee information I have been able to find. I own a WJ V8 with a very modest 2" lift, front air locker and a few other odds and sods. Your vehicle, with all the fruit, is something to which I wish to aspire - what a great truck!!
You're lucky to have access to all that good gear over there. Here in OZ it's difficult to find bits for WJ's. Looks like lots of time to be spent sourcing stuff from the USA.
Thanks for all the great info, footage and photos.
 
#498 ·
No problem, glad you like it. I have more time into this Jeep than I do my High School IROC. However, I am starting to gather parts for that now. Most of the stuff I have left for the Jeep is just minor.

When you decide to have stuff shipped there, you may want to find a company that can combine a bunch of stuff on a pallet for you to save some $. As far as the big stuff goes though, it might be cheaper to have custom stuff made if you decide you want bumpers/sliders/skid plates. Good luck with the build.
 
#499 ·
Did some mild mountain wheeling this weekend, and played a bit in the water at Bear Lake:

 
#500 ·
I checked it with a multimeter, and it is good. I did notice when I checked the SWR again though that it changes drastically when I move the mic. I wonder if I have a bad mic or bad mic wire...
I decided with my day off on Veterans day, that I would touch up a few cosmetic areas of the Jeep. I started by pulling the sliders off. But first, I marked where the body stuck out from the slider (behind the rear doors, just in front of the rear tire). The rocker panel wasn't flush with the slider, and this has bugged me for a while. This pic shows my marker line that I cut to:

I stripped the sliders down to metal, and laid down a fresh coat of duplicolor:

There were some rash marks on the bumper that were starting to rust pretty bad. I sanded those down to bare metal carefully, faded the line between the paint and metal with some 800 grit, and masked it off for paint and clear. I love duplicolor.

The result...clean sliders and bumper. I need to wash the rest of the jeep now, I just washed those areas by hand but left the rest of the jeep dusty so that any overspray would wash right off.

And...look what came in the mail:
 
#501 · (Edited)
If you need to correct your speedometer due to larger tires, it is more complicated on the WJ that on a ZJ. The ZJ has gears in the t-case that can be swapped out, but the WJ uses the rear ABS signal for the speedometer. And because the ABS signal is taken at the wheels, after the axle gears, my speedo still read way off even with 4.56's.

Motomummy sells the SpeedoDRD module made by 12 oclock labs. They sell and make these for bullet bikes, but model U1 (universal model) works great on the WJ's. It modifies the ABS signal, up or down, to correct for different tires.

I installed the DRD module today...I should have done this years ago! It is nice to have a speedo that reads correctly.

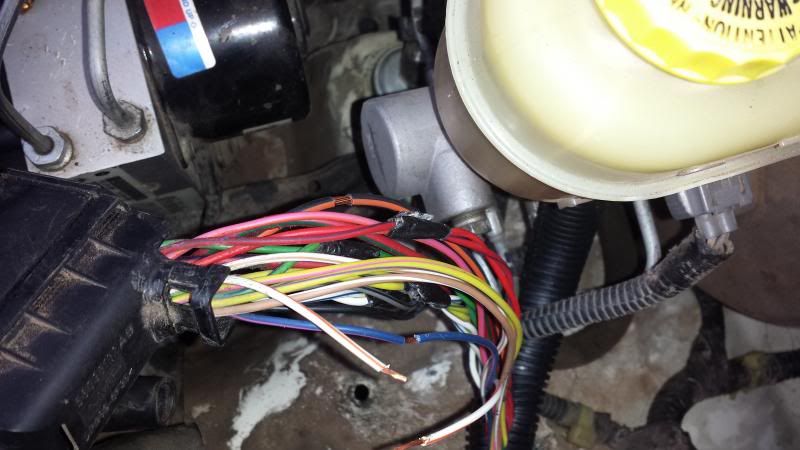
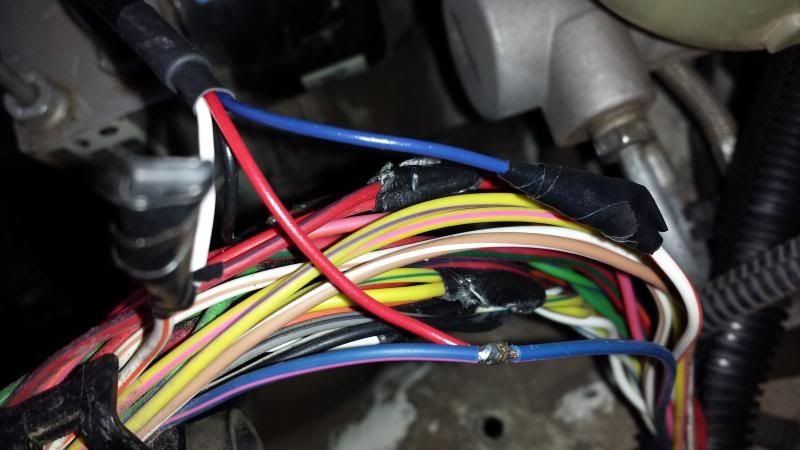
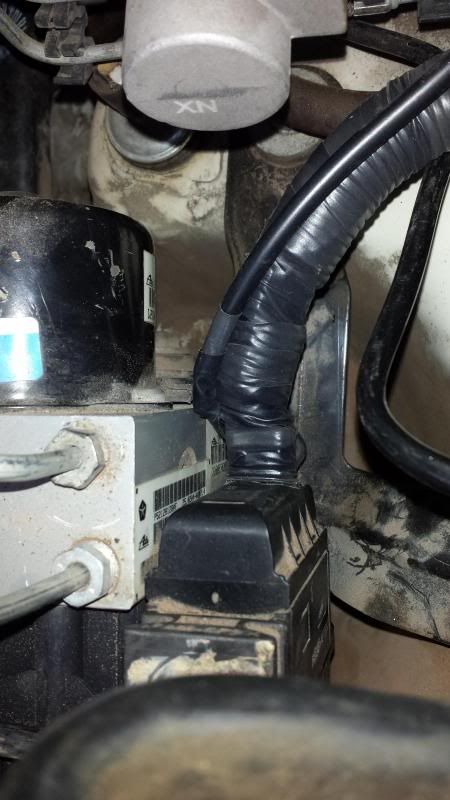
The first thing I did was remove the charcoal canister to give room to work with more of the wires. I then unplugged the harness from the ABS module, peeled back the harness cover, and found the wires:

- Black with orange stripe wire in harness - strip insulation away but do not cut the wire - connect DRD's black wire
- Blue with pink stripe wire in harness - strip insulation away but do not cut the wire - connect DRD's red wire
- White with orange stripe in harness - cut the wire, and strip insulation from each side - connect DRD white wire to ABS module side, DRD blue wire to body side (Green w/Yellow stripe on newer WJ's)

The two first wires are power/ground, and the other two connect the ABS signal and modify it. I will not post how to program it here, because they have great instructions with the module and on their website. It took me about 2 minutes to program it...very easy to use. You don't need any special equipment or electronic skills, there is a button on the module. You use that button, and count flashes on the LED's on the module, it is easy to program.

Factory wires ready to connect:


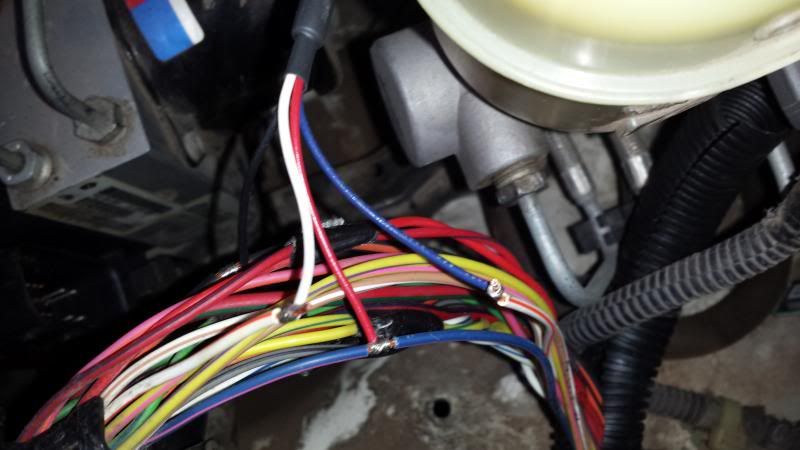
DRD wires connected to the ABS harness:


After a quick test run, I soldered the wires to the harness. This pic shows one soldered, and the others soldered and covered in electrical tape. I currently have it set to a correction of +16.8 but may change it to 16.6 to dial it in a bit more, I need to do another freeway speed test. I am using two different GPS apps on my android to dial it in. I did notice that the speedo stays at 0 until I hit about 3 mph or so, and it also floats at 3 mph for a split second after I stop. Not that I am concerned about the 1-3 mph range, so I am not worried.


I then covered the harness with the factory sheath, covered in new electrical tape, and routed the DRD module away from the abs module.


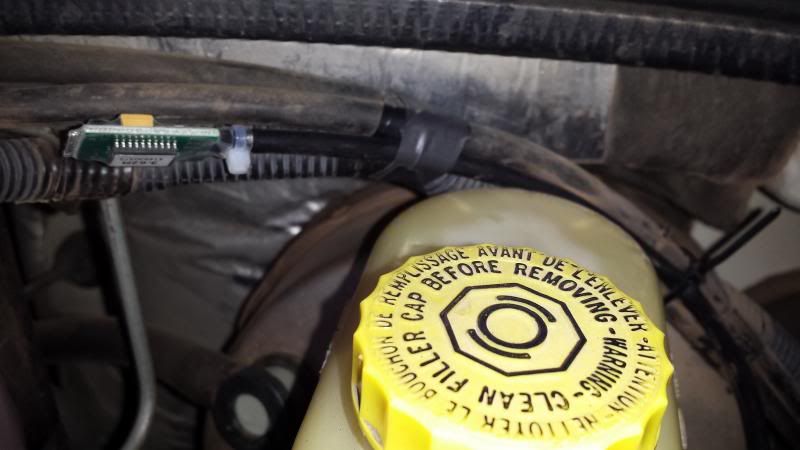
The DRD module is now placed up against the firewall, just behind the master cylinder and brake fluid reservoir. It is very small, about 3/4 of an inch wide by 1&1/4 of an inch long, with a wire tail about 12 inches long. $70 to fix the speedo, well worth it.


Thanks to Moony, TheKSmith, (both on Jeepforum) for providing me with help as I did this!
 
#502 ·
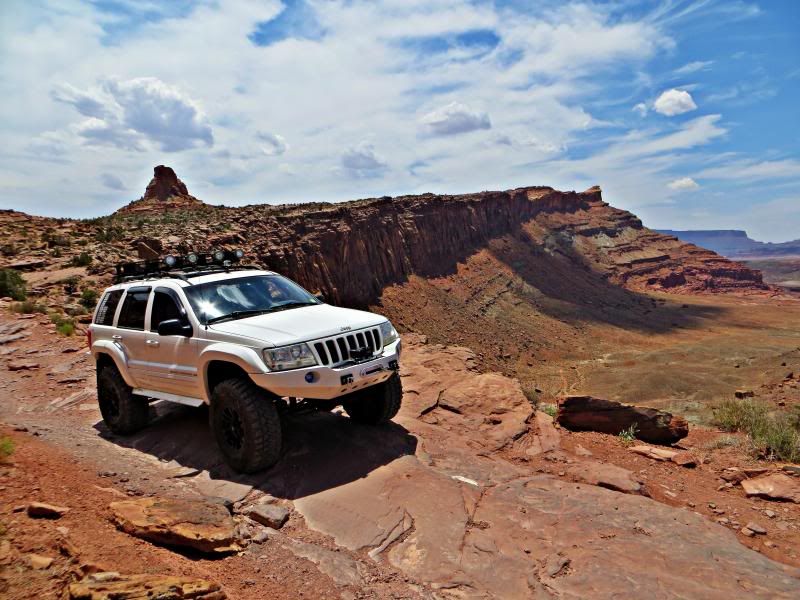
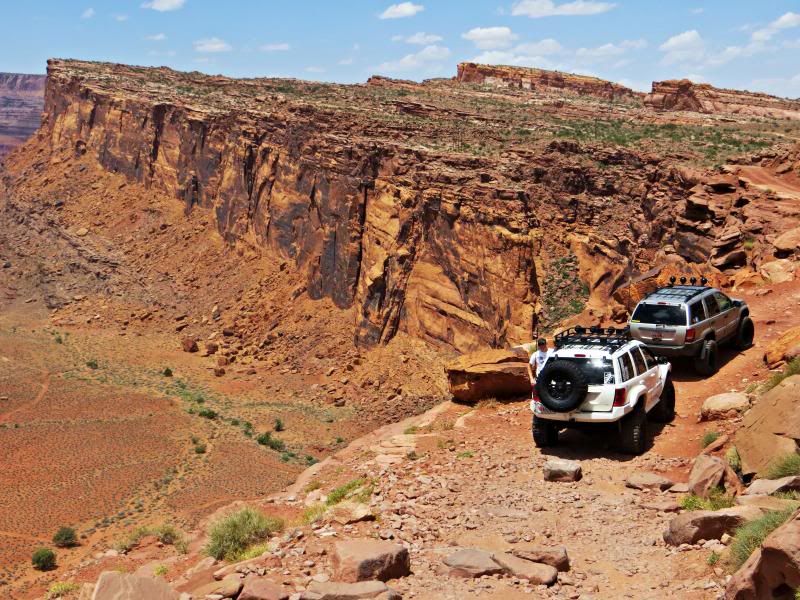
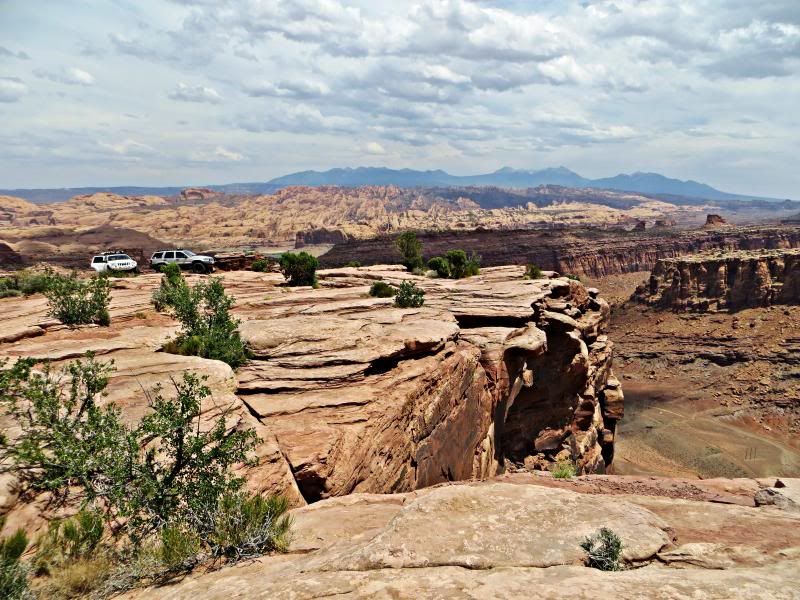
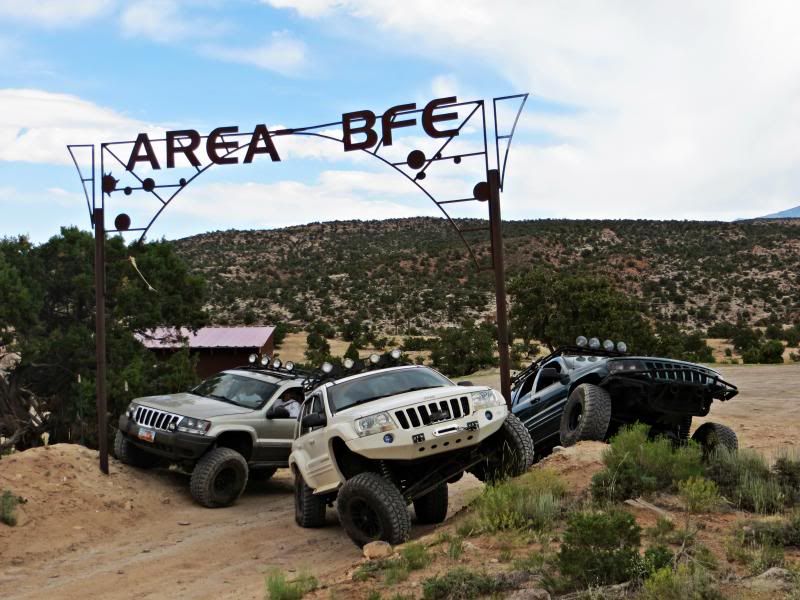
Annual Thanksgiving trip to Moab. As always, it was great to hang out with good friends and also get to know others even better.

Poison Spider:


With her Daily Driver:


The Waterfall:


A few miles into Golden Spike, my spring retainer broke. I knew this would cause me to drop the spring a couple of times, but I would have to deal with it later. We pulled the spring and removed the broken retainer post.


Gulch below Zuki Hill:


Crossing Golden Crack. I knew I would drop a spring...


Awesome jeepers holding the spring in place for me while I inched forward until it re-seated.

Just leaving some white paint on the crack:


Fixing a dropped coil one more time WJwheelin's expert welding skills had me fixed up the next morning.


If it weren't for Team1k, I never would have attemped Easter Egg hill nor the Intimidator. Expert spotter for sure!


Boreal, SanJuanGrand, and others keeping my body and glass off of the rock. It really tips you, much worse than it looks:


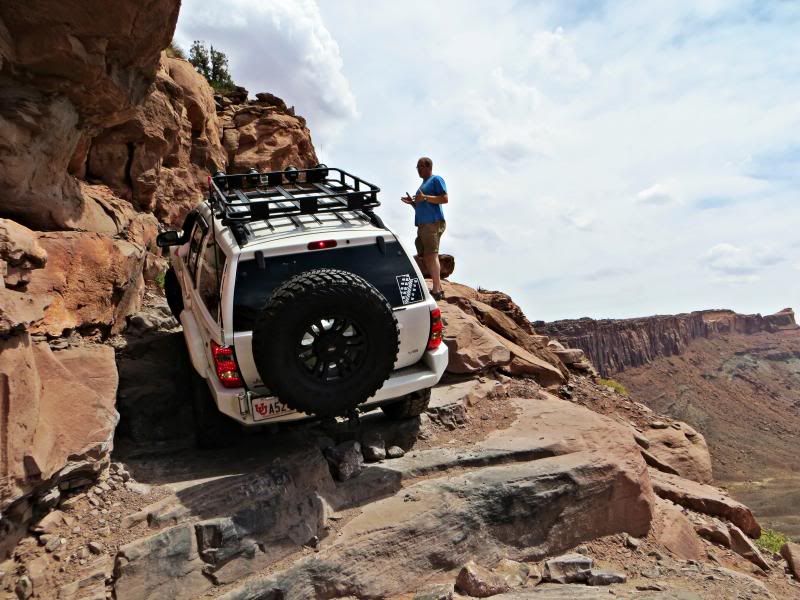
Approaching the intimidator, right next to a high cliff ledge:


The Intimidator is off camber and ...well...very intimidating.


Looking forward to the next trip, time to edit some vids.
 
#503 ·
Awesome pics as always.
I just drove though that area on vacation with my wife. Did national arches, Capitol reef, Bryce and Zion. The whole time going " I need my jeep" :)
 
#504 ·
Yeah, it is a Jeeping Heaven!
 
#505 ·
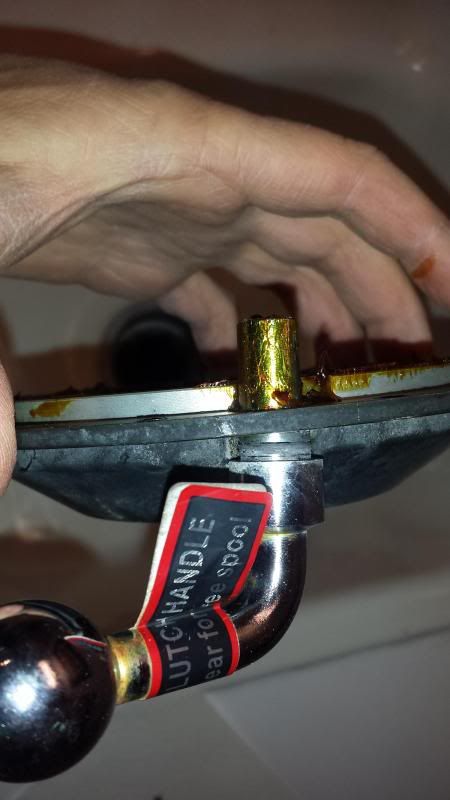
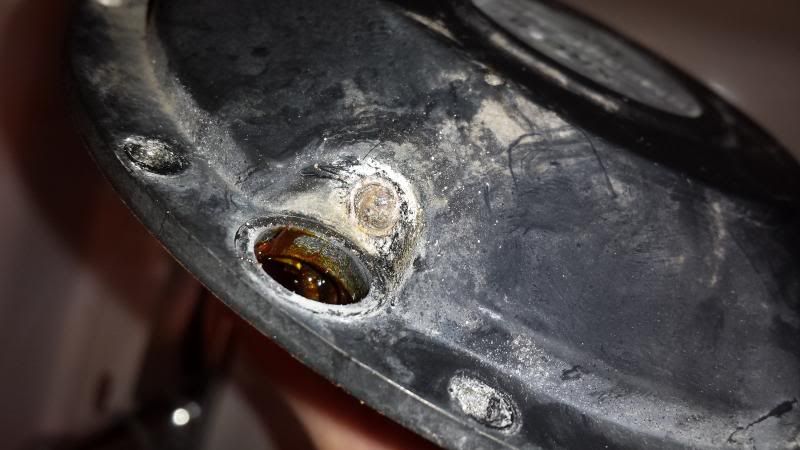
My winch (Smittybuilt, less than a year old) was frozen in the engaged mode. According to 4wp, they have seen this a few times. They hooked me up with a new outer cover, selector lever, and install kit.

There is a spring that rests into a bore in the outer cover, with a steel ball on top of it. The selector compresses the spring, and rests on the ball. The selector has two cavities in it that the steel ball rests into, thus keeping the spring loaded selector in the engaged or freel spool modes. This bore filled with water, corroded, and the spring/ball would not move.


When I installed the new cover/spring/ball/lever, I filled the bore with grease to prevent future corrosion. I also added a cover to prevent further issues.


Today I visited two salvage yards and picked up the following:
- Rear interior panel for the drivers side cargo area (I put a hole in mine)
- Drivers door lock mechanism (mine is making some funny noises, sounds like it is on its way out)
- Hood latch (I have to slam mine to get it to shut, time to replace)
- Two pieces of rear door seal (the usual WJ seal shrink...I am going to piece in some extra material at the bottom seam so that it doesn't fall out of the corners anymore)
- A few door clips to replace those that I will inevitably break when I R&R the actuator
- Bottom half of the airbox (2 of my 4 clips have broken off)
- Black center vent and radio console (in case I decide to do a double DIN, this will allow me to modify it and have a spare)

EDIT-----
Rear interior panel installed, hood latch fixed, and bottom half of airbox installed. It was cold, so I will do the door lock mechanism later.

The hood latch ended up being fine. I noticed that I didn't have enough support on the upper radiator support, so I installed two 1/4 thick nuts between the two vertical support bars in the middle of the grill and the front lower bumper area. this forced the upper radiator support to move up just slightly. I also noticed that the hood still wasn't latching easily. I found that the cable was not releasing, and it was because it was pinched between the outer fender and the Charcoal canister (when I replaced the booster I must have pinched it. Hopefully the cable is fine. I moved the cable from pinch spot, and it is working fine now. It is good to have 4 working latches on the airbox. I did notice that the latches had lost much of their spring. So I removed each one, pinched it slightly, and now they all grab and hold the top of the airfilter box on very well.
 
#506 ·
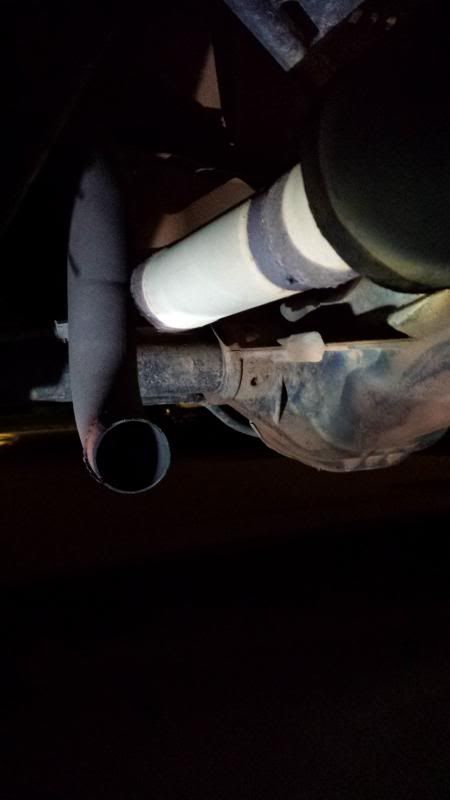
All those wheeling trips have had their toll on the exhaust system. I have had to weld the inlet back onto the muffler two times, and now this happened:


I was just going to put a turn down on it and call it good, but I just decided to run over to a local exhaust shop and have a magnaflow installed. I also had them cut the hanger and raise the rear of the pipe about 3 inches. It matches the lines of the Protofab much better now.
 
#508 ·
Thanks. It gets scratched on the rocks (sliders and bumpers), but I try and touch it up annually to keep it looking good.